Do you want to learn the Foundation Paper Piecing technique? Or do you want to see which is the FPP “way” is the one I think is the best? Keep reading this tutorial and don’t miss download the free pattern!
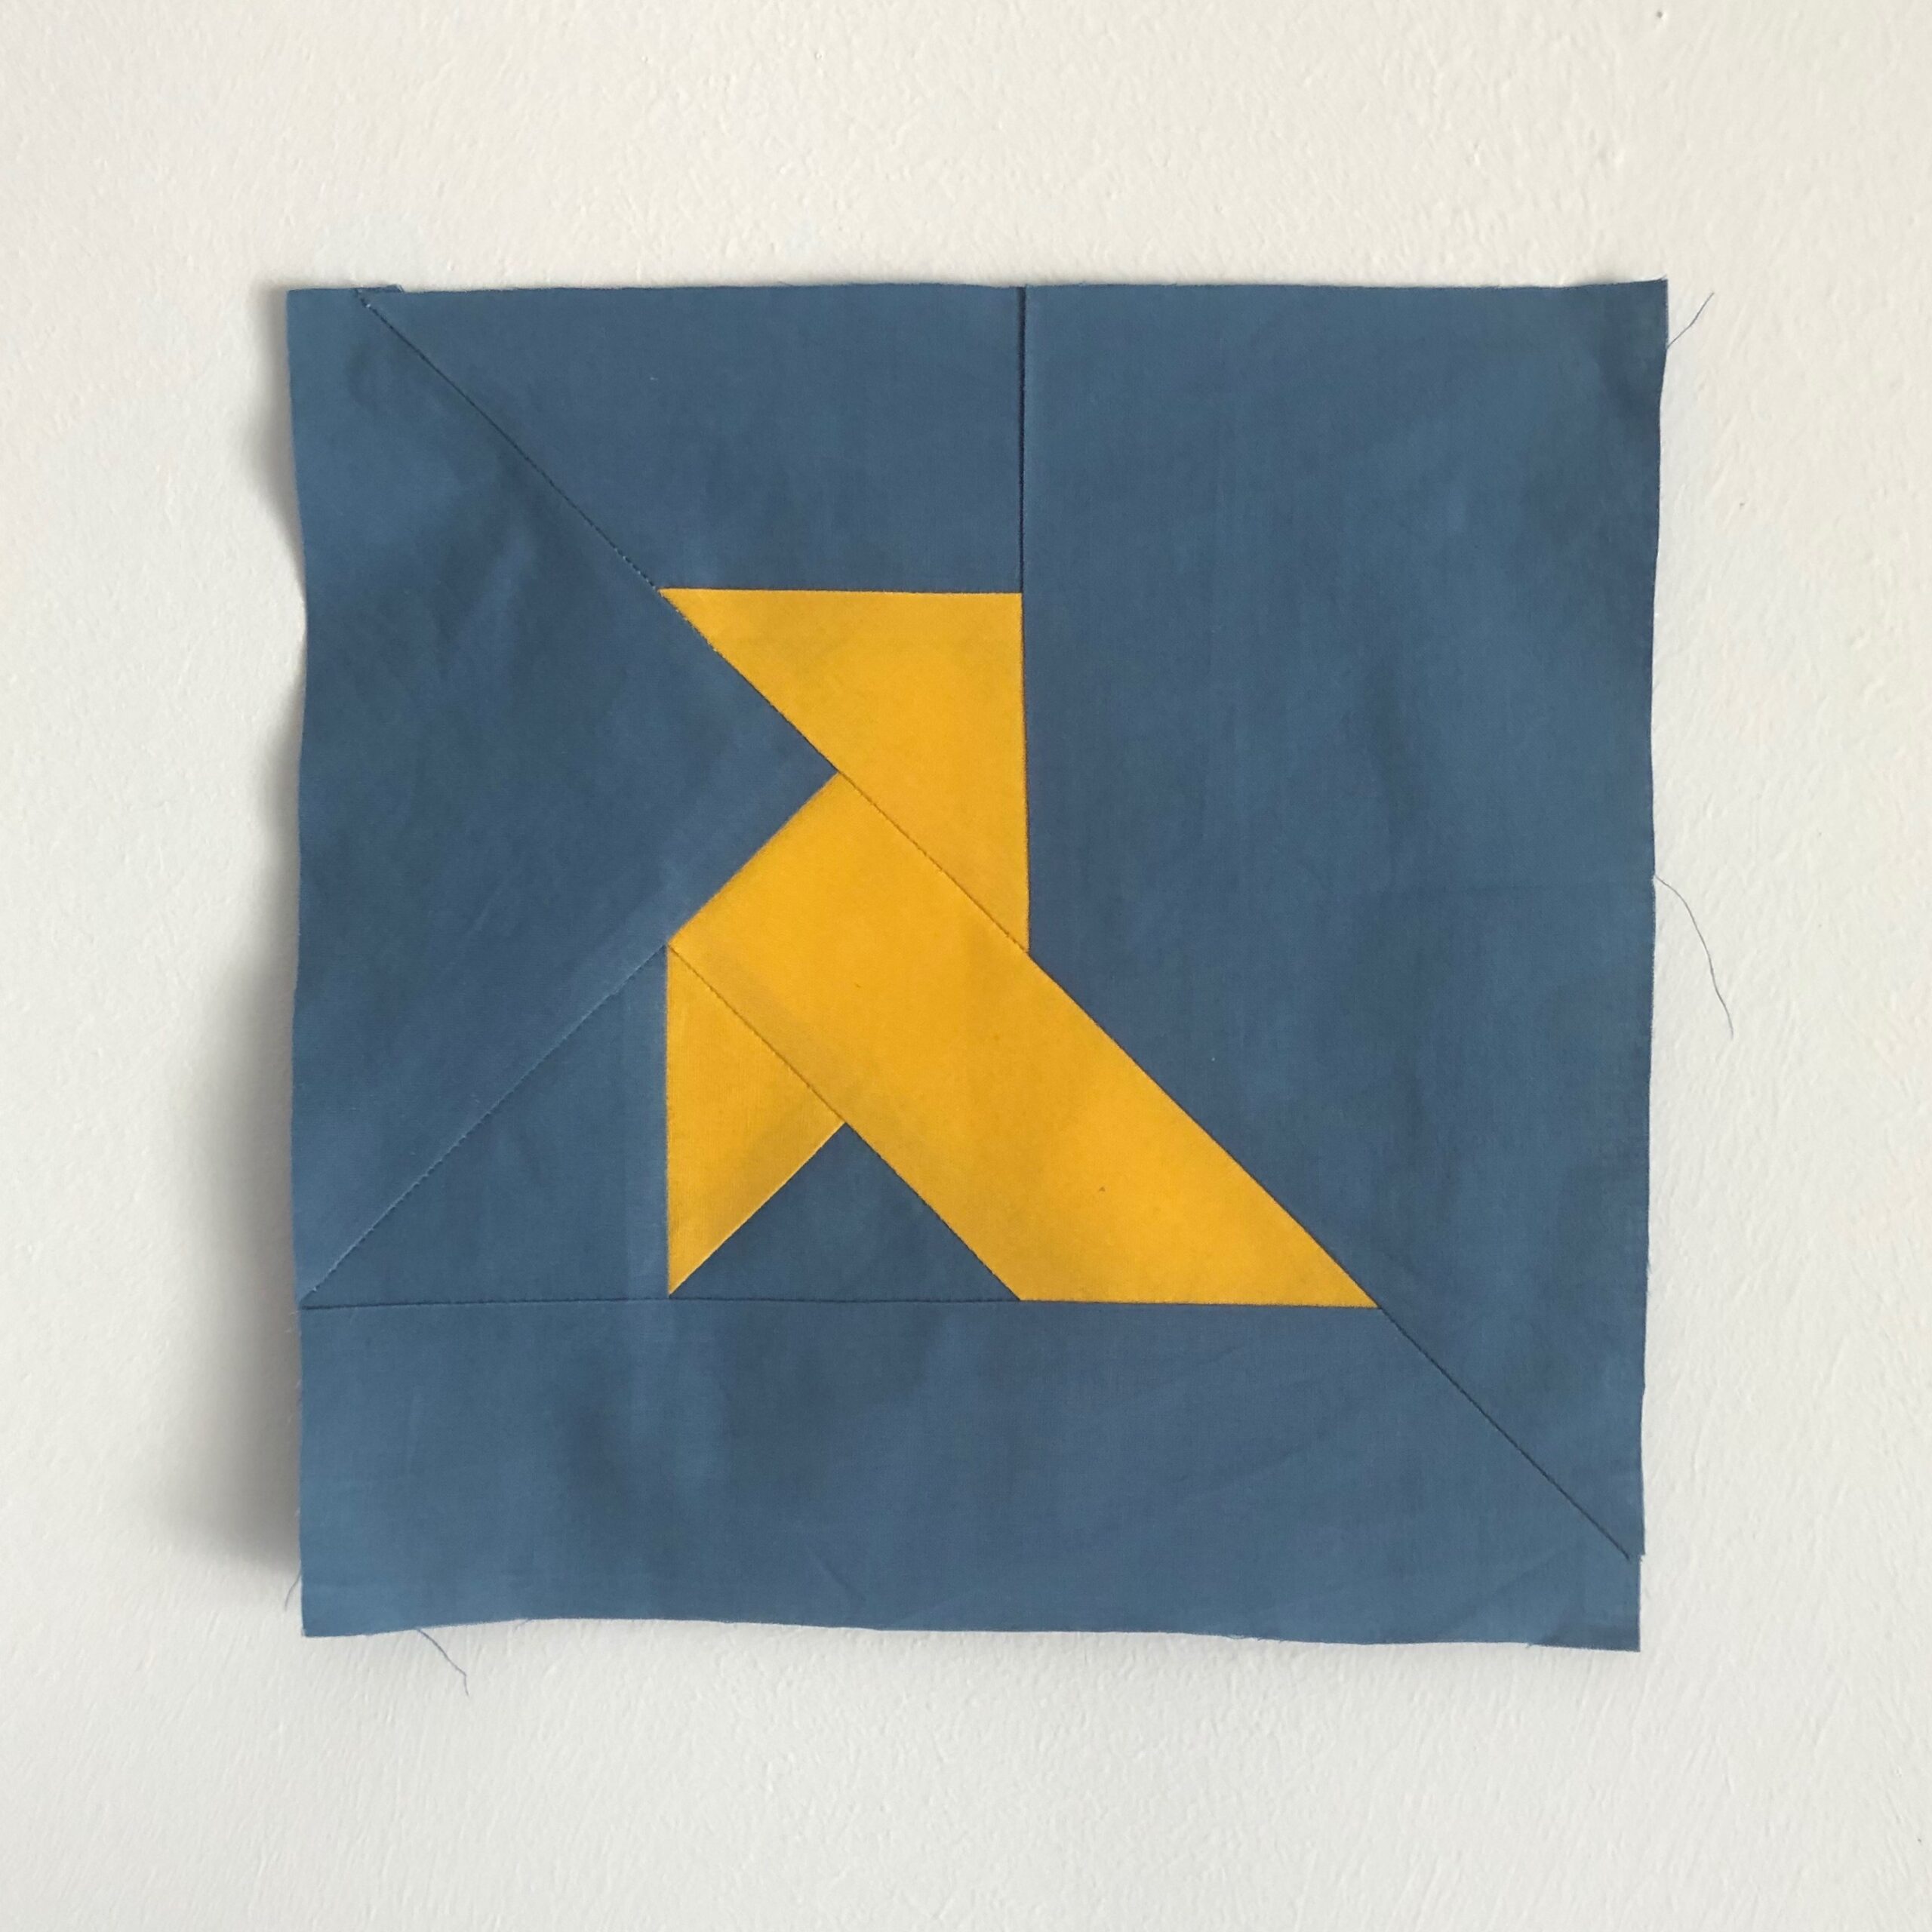
Origami Bird Free Pattern
Here is the pattern you can make while following the step by step tutorial about Foundation Paper Piecing.
It’s a simple, fast and fun pattern that will allow you to see how this technique works and get started!
The pattern is available in 4 versions, choose the one you prefer!
Index
Basic concepts of FPP
WHAT’S THE FPP?
Basic concepts of FPP
In this unit you will find the introductory concepts to the FPP and the materials that we will need.
WHAT’S THE FPP?
The Foundation Paper Piecing (FPP) is a patchwork technique that involves joining pieces of fabric with a sheet of paper as a base, in which a drawing is printed that will serve as guide to joining the fabrics. With this technique you can get very complicated figures in a relatively simple way.
It’s different from the “English Paper Piecing”, where the fabric pieces are first made with a paper pattern each individually and then joined by hand. These are different techniques and the way in which the figures are obtained is also different.
Following the FPP, here you can see the paper drawing we will use to create the Origami BIRD. You have it included in the pattern that you can download in the previous unit.
BASIC CONCEPTS
To start, we will see a series of basic concepts to keep in mind at all times when we are developing a FPP pattern. Maybe at first glance you will not understand it but when we go doing with the pattern, all will be clearer.
(I’m going to publish each one in a different publication to make it more structured in the Unit)
1. Inverted draw
The first consideration to keep in mind is that the drawing on the paper is inverted, mirrored. This is because we sew the fabrics on the back of the paper and when we take out the paper we will have the drawing in the orientation we want. This always happens, all the FPP patterns have the drawing inverted.

2. Sections
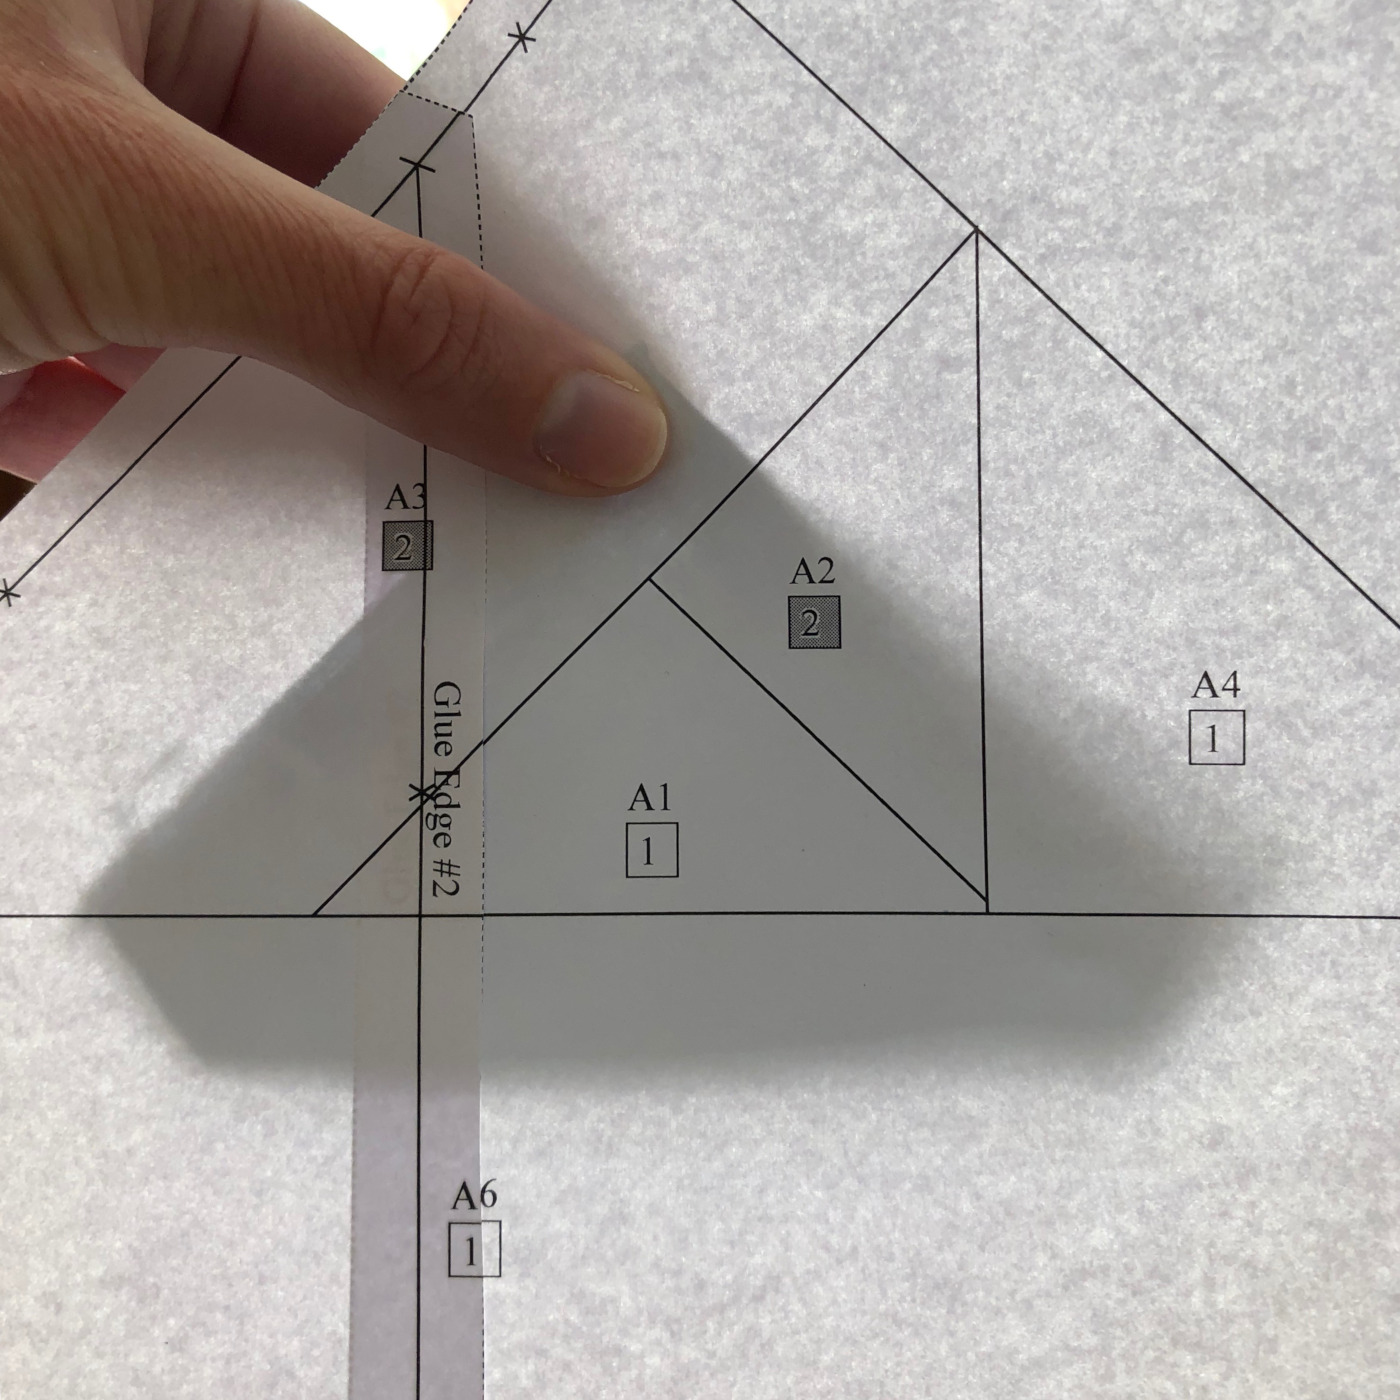
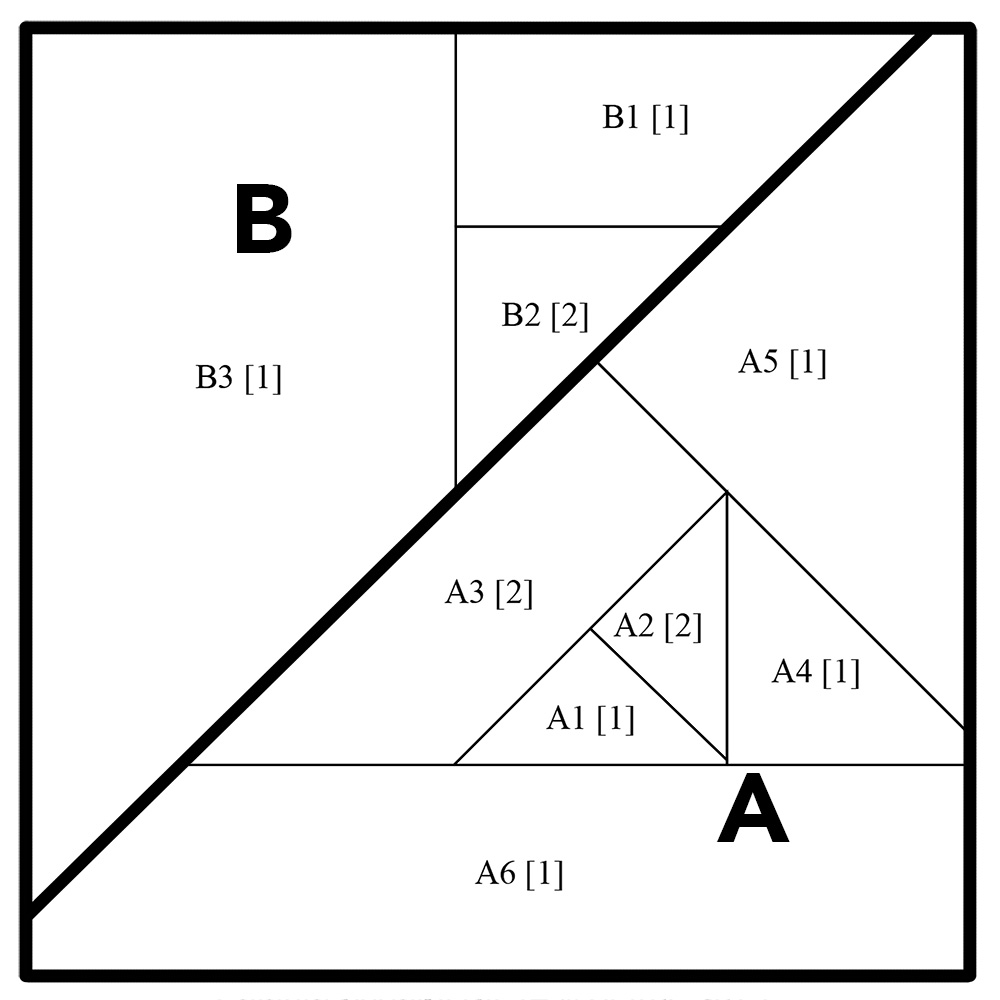
With this technique we will unite the fabrics with the base paper. In a simple pattern with a piece of paper is enough but with a more complicated pattern, more than one piece of paper are needed. We will call each one of these different pieces of paper SECTIONS. To teach you the technique of FPP I wanted to make a pattern with several Sections, so you will know how to do it when you find it in another pattern. You can see in the pictures that our pattern has two pieces of paper, so we will have two sections, A and B. Within each section, you can see different figures drawn, these are the different fabrics that we are going to join. Each figure has a letter and number, which indicate to us, with the letter the section in which we are, and with the number the order in which we are going to place each one of the fabrics. For example: figure A3, means that it is the figure that corresponds to the fabric that we are going to place in third place in section A. On the other hand, The number shown in a box, 1 or 2, indicates whether it is the background fabric [1] or the fabric of the figure, the BIRD [2].
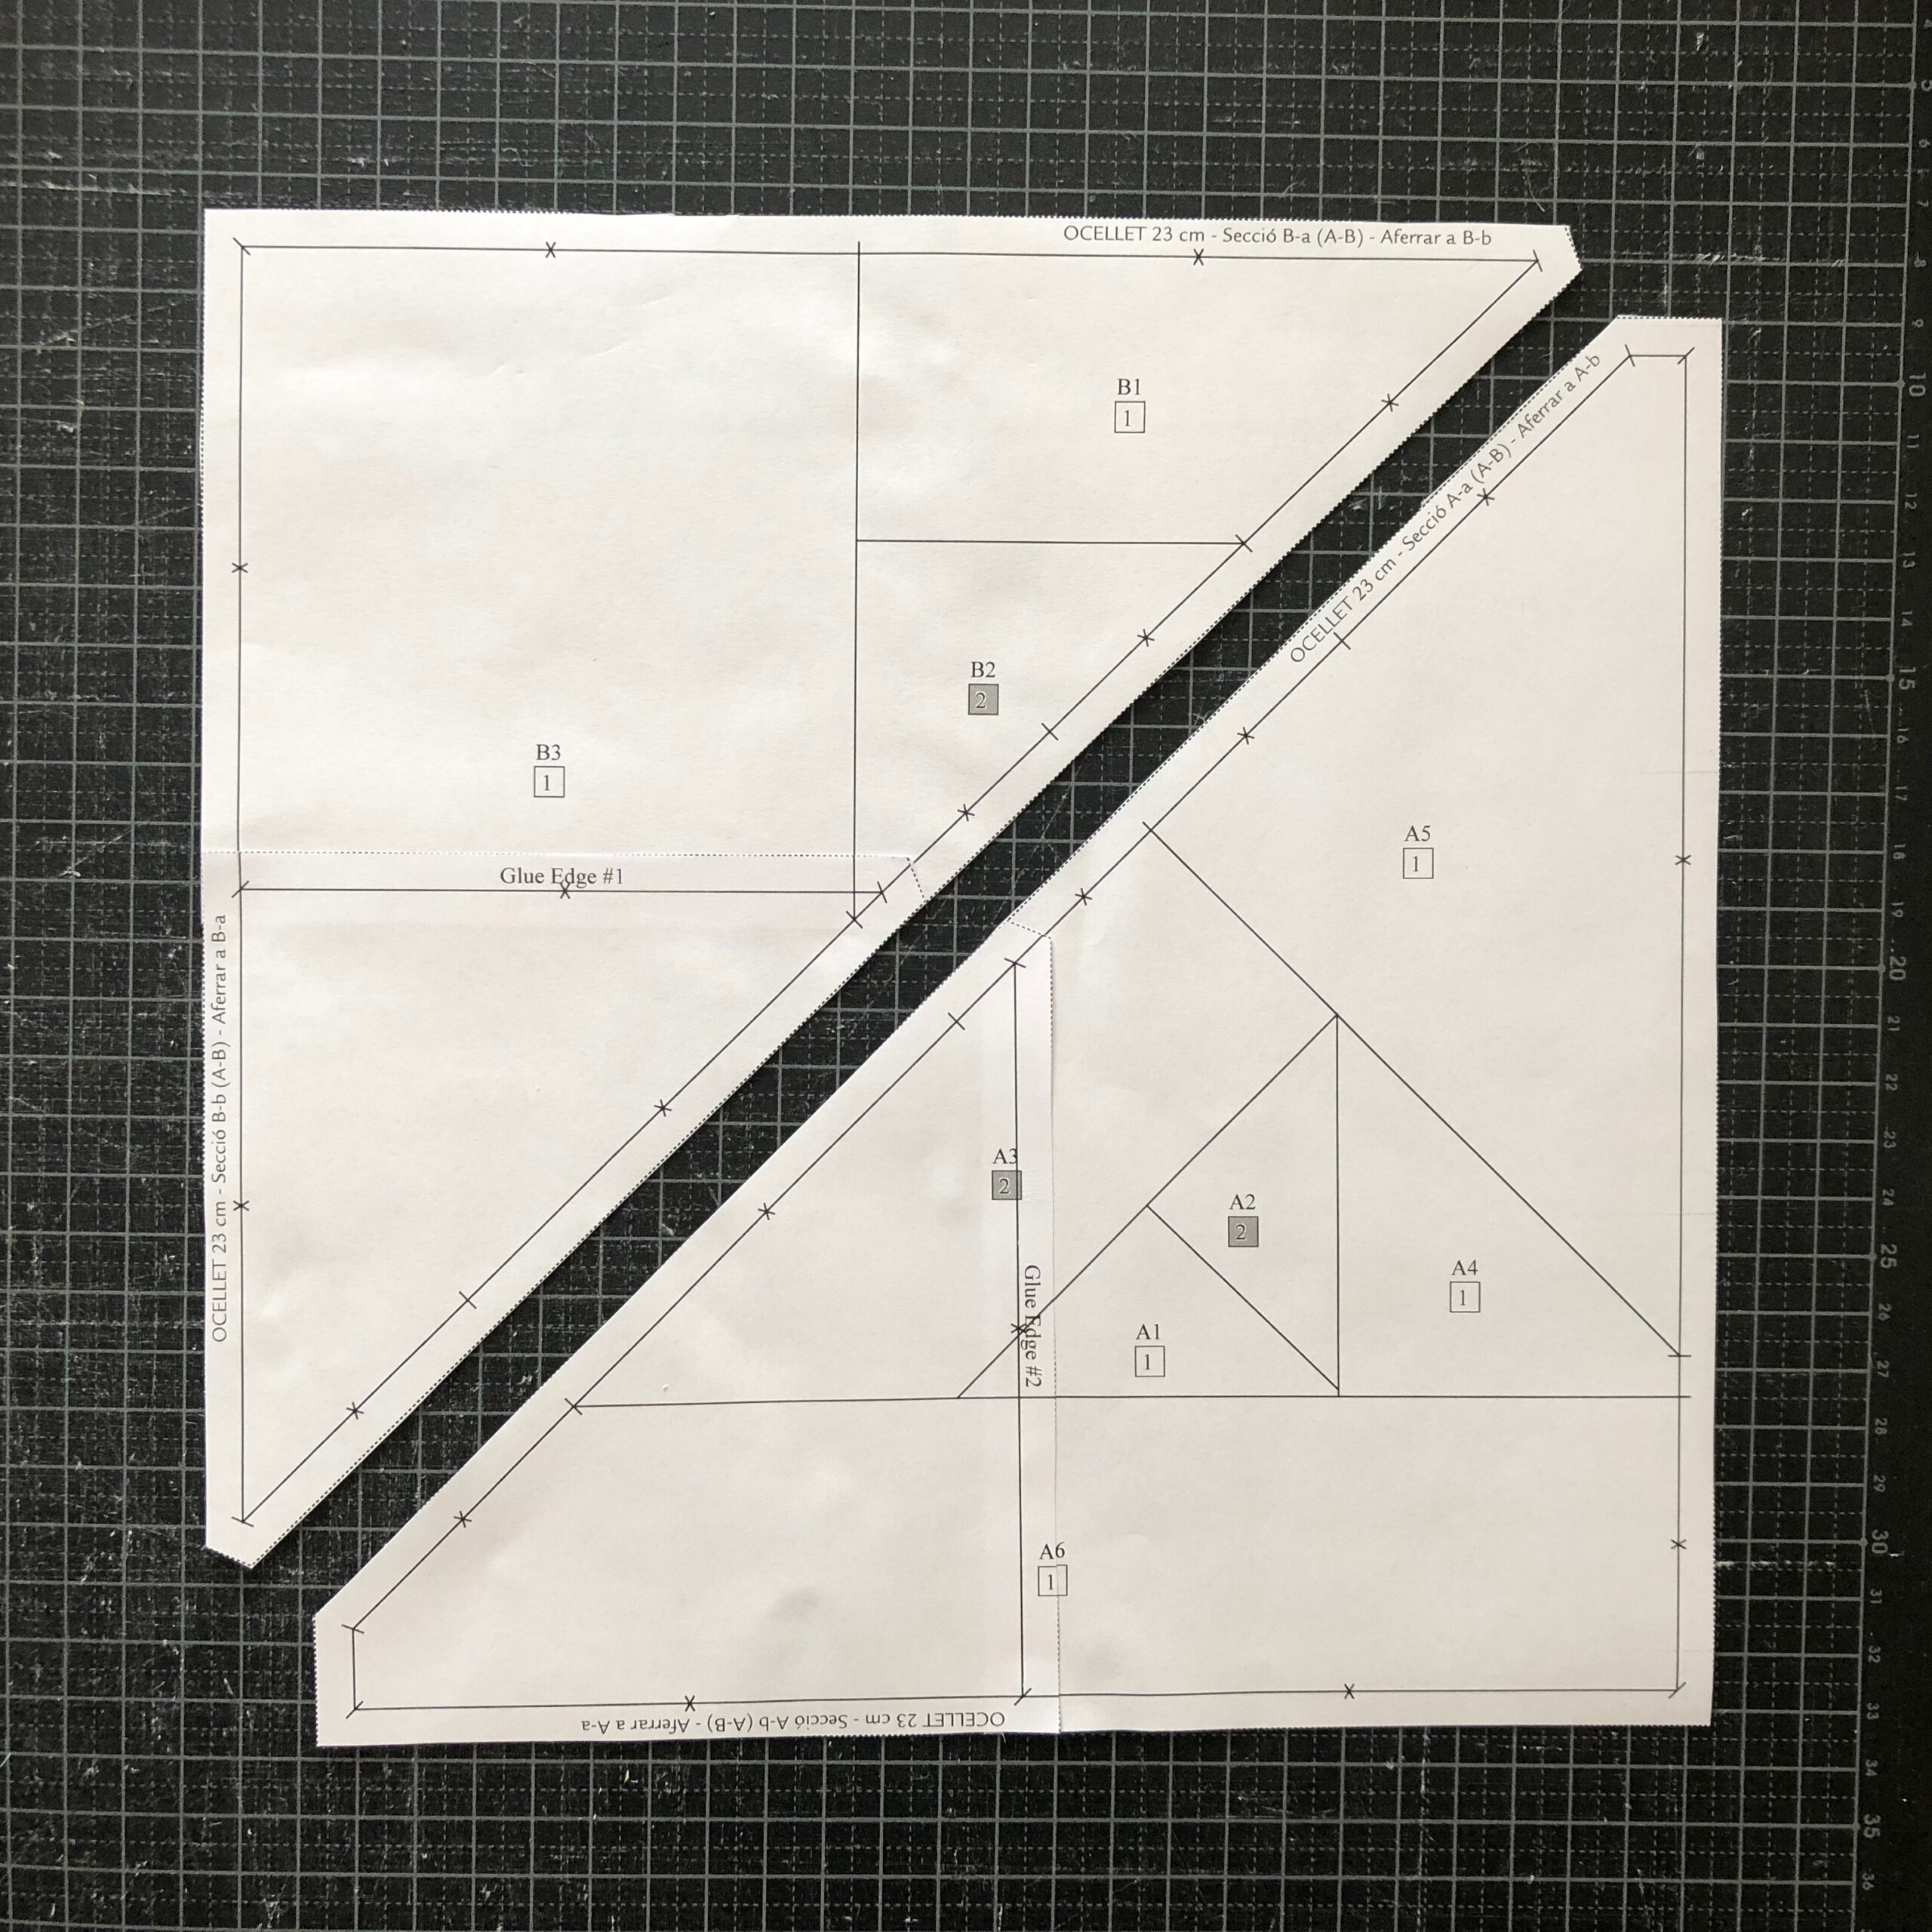
3. Papers
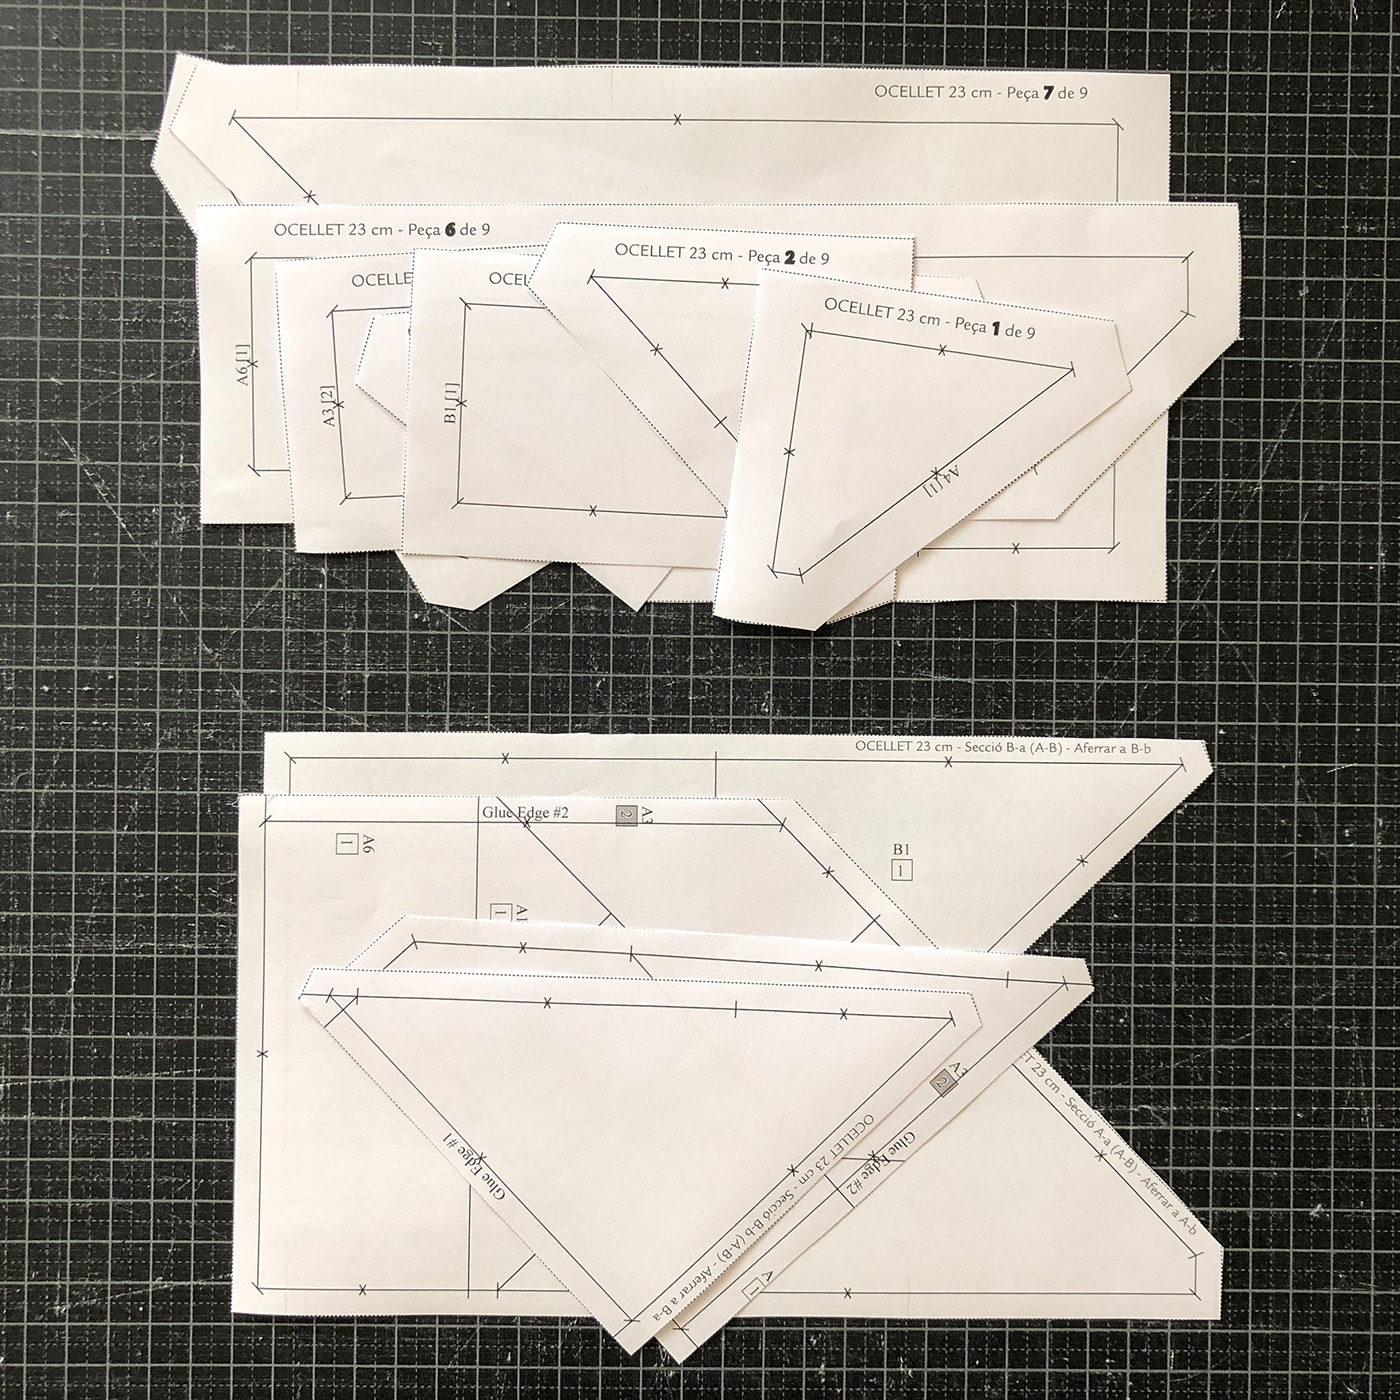
You will find two groups of pieces of paper in the pattern:
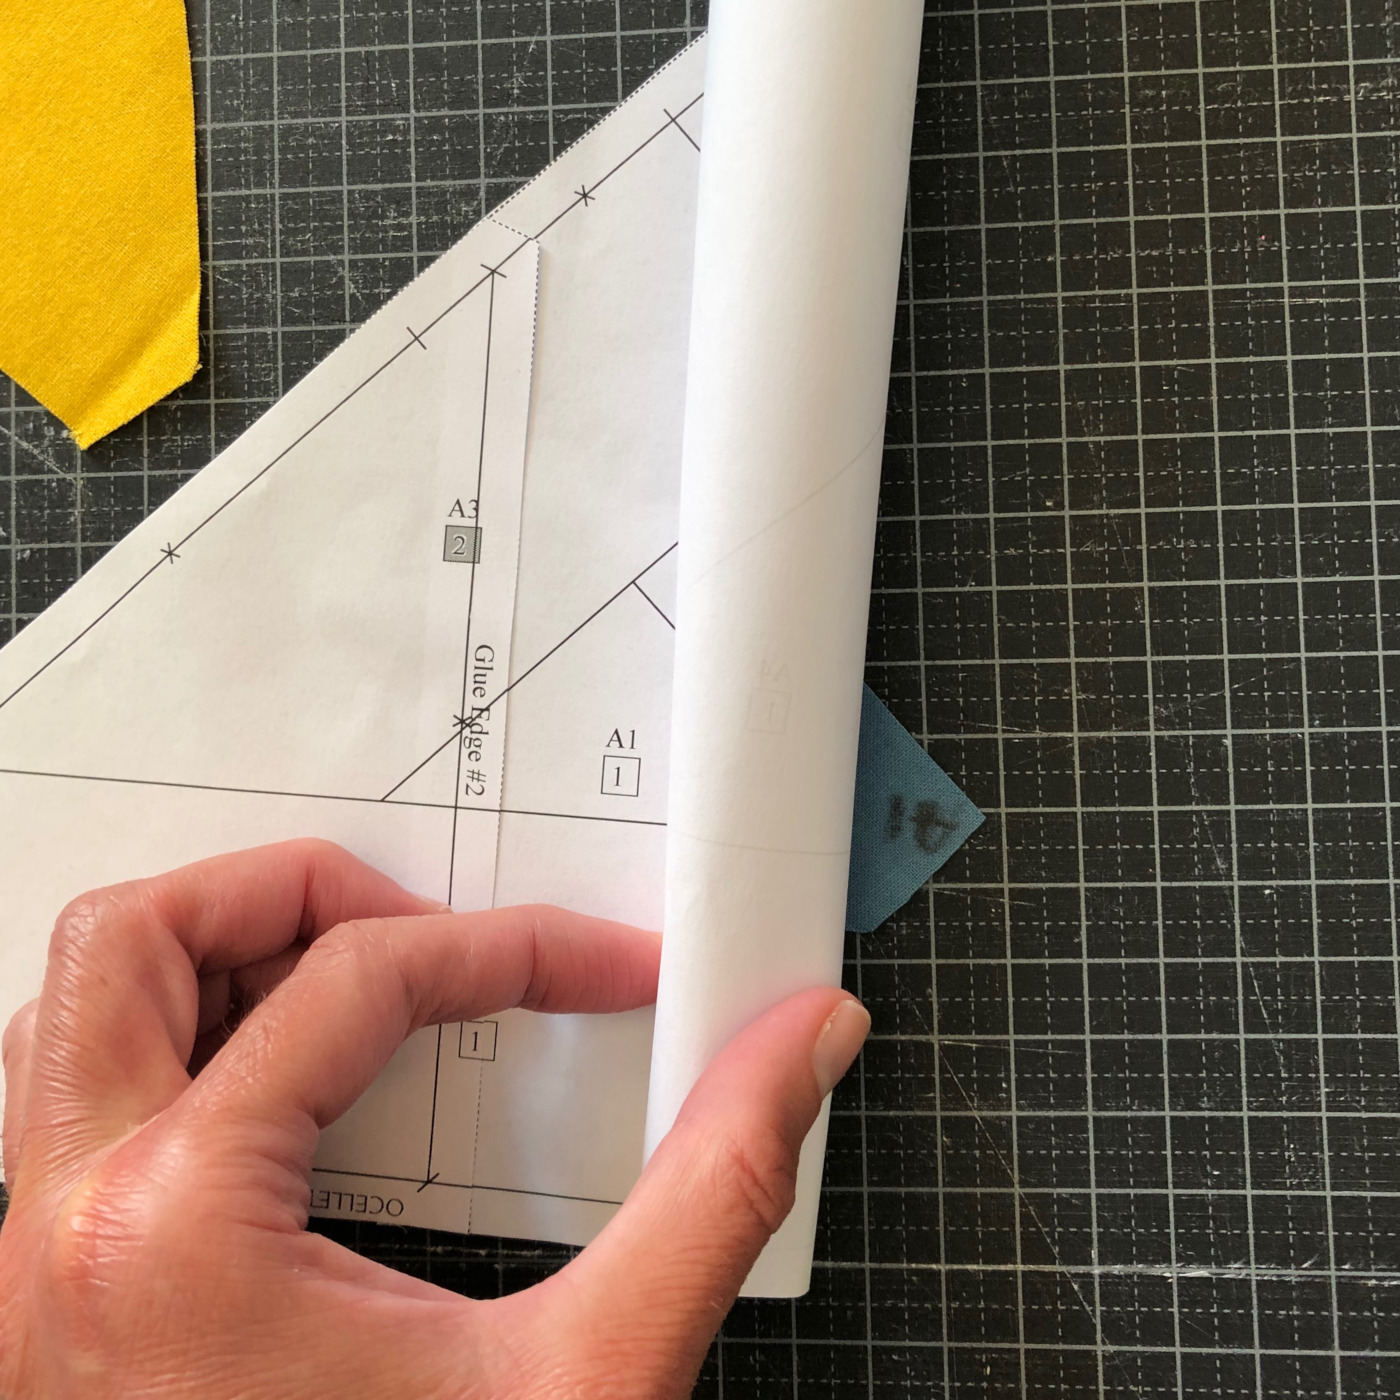
1 – The pieces of paper for the Sections, with a margin of 1/4” (0,64cm), seen before. (At the bottom in the photo).
2 – The templates for cutting the fabrics, with a bigger margin, of 1/2” (1,3 cm). You will not find these templates in all the FPP patterns, but I have wanted to include them here because you know about their existence and how they are used. (At the top in the photo).
4. Sewing the Fabrics
1. The fabrics are placed and sewn on the part of the paper where there is no drawing, at the reverse of the paper.
2. The fabrics go with the right side viewed, the back of the fabric will be in contact with the paper
3. To join two fabrics will make an stitch-line over the line of the drawing between the two figures/fabrics that we want to join.
4. The stitches lines are made with the paper on the top and the fabrics below.
5. The stitches have to start a pair of stitches before the start of the line and nish a pair of stitches
after the end of each line of union of two fabrics. The length of the stitches must be small (1,5-2) so it is easier to take out the paper after finishing.